Assignment 2
Intro to Infrastructure-as-Code
In Assignment 1, you manually set up a basic web server and web page on an EC2 instance. However, such a configuration isn’t optimal for a production system because there is no redundancy and all extra capacity must be added manually.
In this assignment, you’ll learn to deploy a web app in a robust, well-architected, and scalable way, using the AWS Cloud Development Kit (CDK) to provide a single, reproducible source of ground truth for your cloud resources.
Yoctogram
Through the rest of the quarter, our deployments will involve Yoctogram, a minimal image-sharing app we built for you. The backend is written in Python, using the FastAPI web framework and SQLAlchemy to interface with a database. The frontend is written in ReactJS.
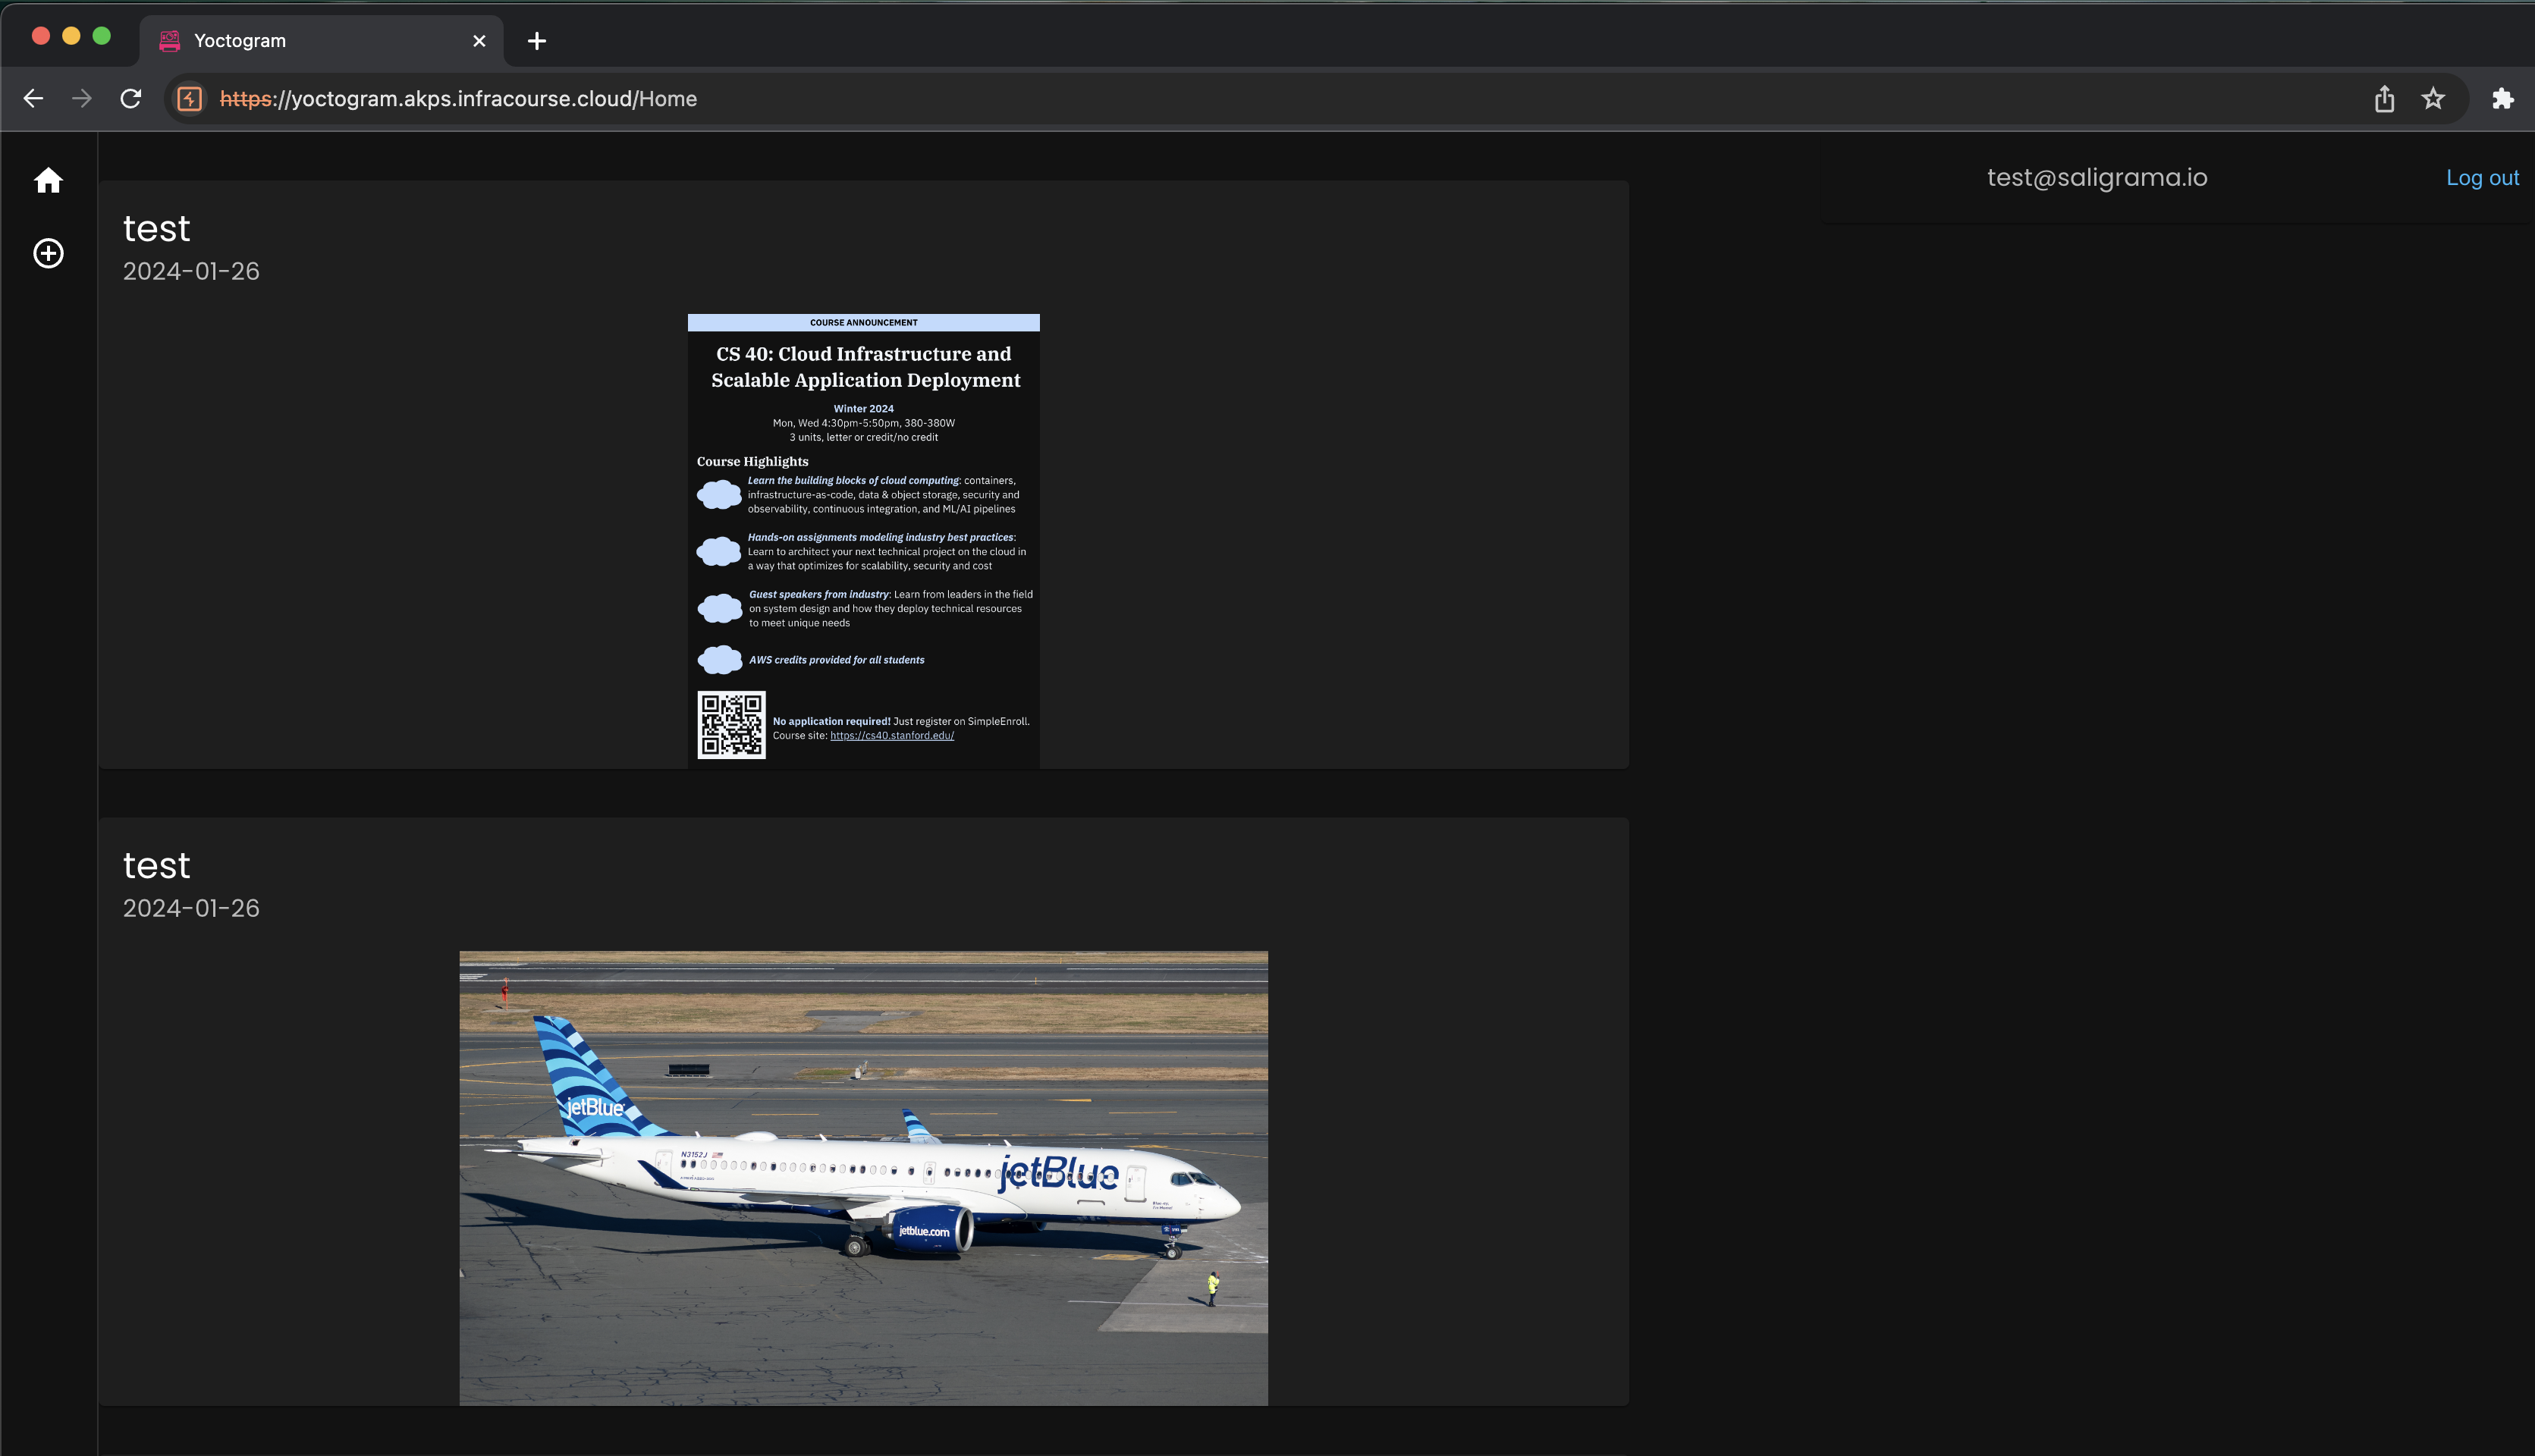
Yoctogram’s functionality is limited: it allows you to upload images that are designated public (visible to everyone) or private (visible to only yourself), view others’ public images, and view a feed of images ordered by recency.
Cloud services
Despite the application logic being intentionally simplistic, Yoctogram still relies on a number of key cloud constructs.
This diagram depicts the deployed cloud resources that Yoctogram uses.
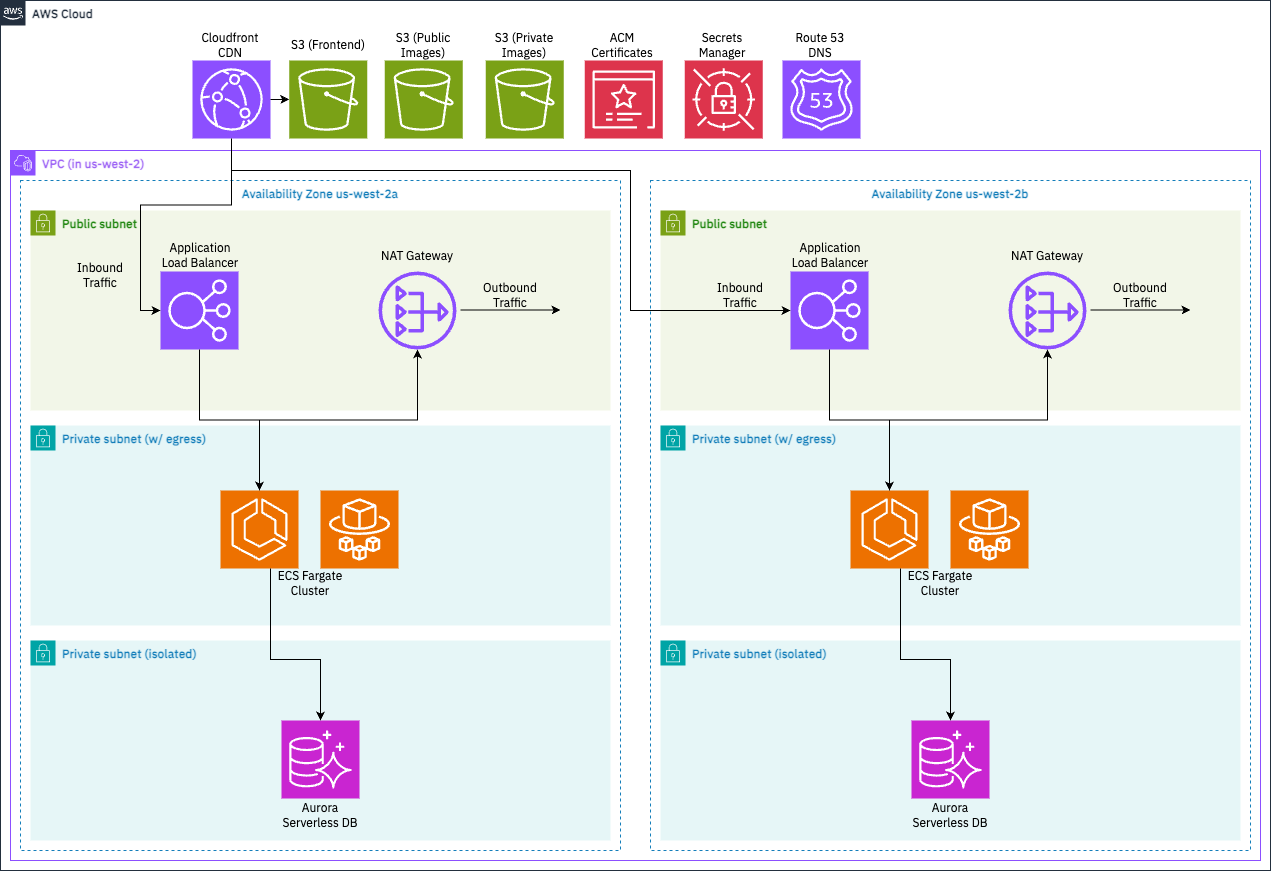
We can categorize the resources we need as follows:
- Compute resources: where does the app run?
- On Docker containers, where AWS manages the scaling through Elastic Container Service (ECS). AWS also manages the scaling through Fargate.
- An Application Load Balancer (ALB) will be used to handle incoming API requests and assign them to a target container for processing.
- The app’s frontend will be deployed to an Simple Storage Service (S3) bucket and served to users via Cloudfront, a content delivery network (CDN) that caches content closer to the user, making downloads faster and cheaper.
- Data resources: where does the app store data?
- User information and image metadata is stored on a Postgres database available through Aurora Serverless, where AWS manages the database cluster and exposes an endpoint for the app to connect to it.
- The images themselves are stored in S3.
- When users visit Yoctogram, images are rendered through Cloudfront.
- Networking resources: supporting compute and data resources
- The ECS cluster and Aurora Postgres databases need to be provisioned within subnets of a Virtual Private Cloud (VPC).
- The ECS app cluster will live in a subnet assigned private IP addresses but with outbound internet access through a NAT gateway.
- The database cluster will live in a private subnet with no outbound network access, only accessible to the app cluster through internal networking.
- To make your app easy to access, your frontend will be assigned the domain
yoctogram.SUNET.infracourse.cloudthrough Route 53. - To provide HTTPS encryption in transit, we’ll use the Amazon Certificate Manager to assign your load balancer and frontend distributions a Transport Layer Security (TLS) certificate.
Getting started
First, log in to your AWS console and deposit the credit code we give you in your account. Check Ed for details on how to do so.
Setting up a development EC2 VM
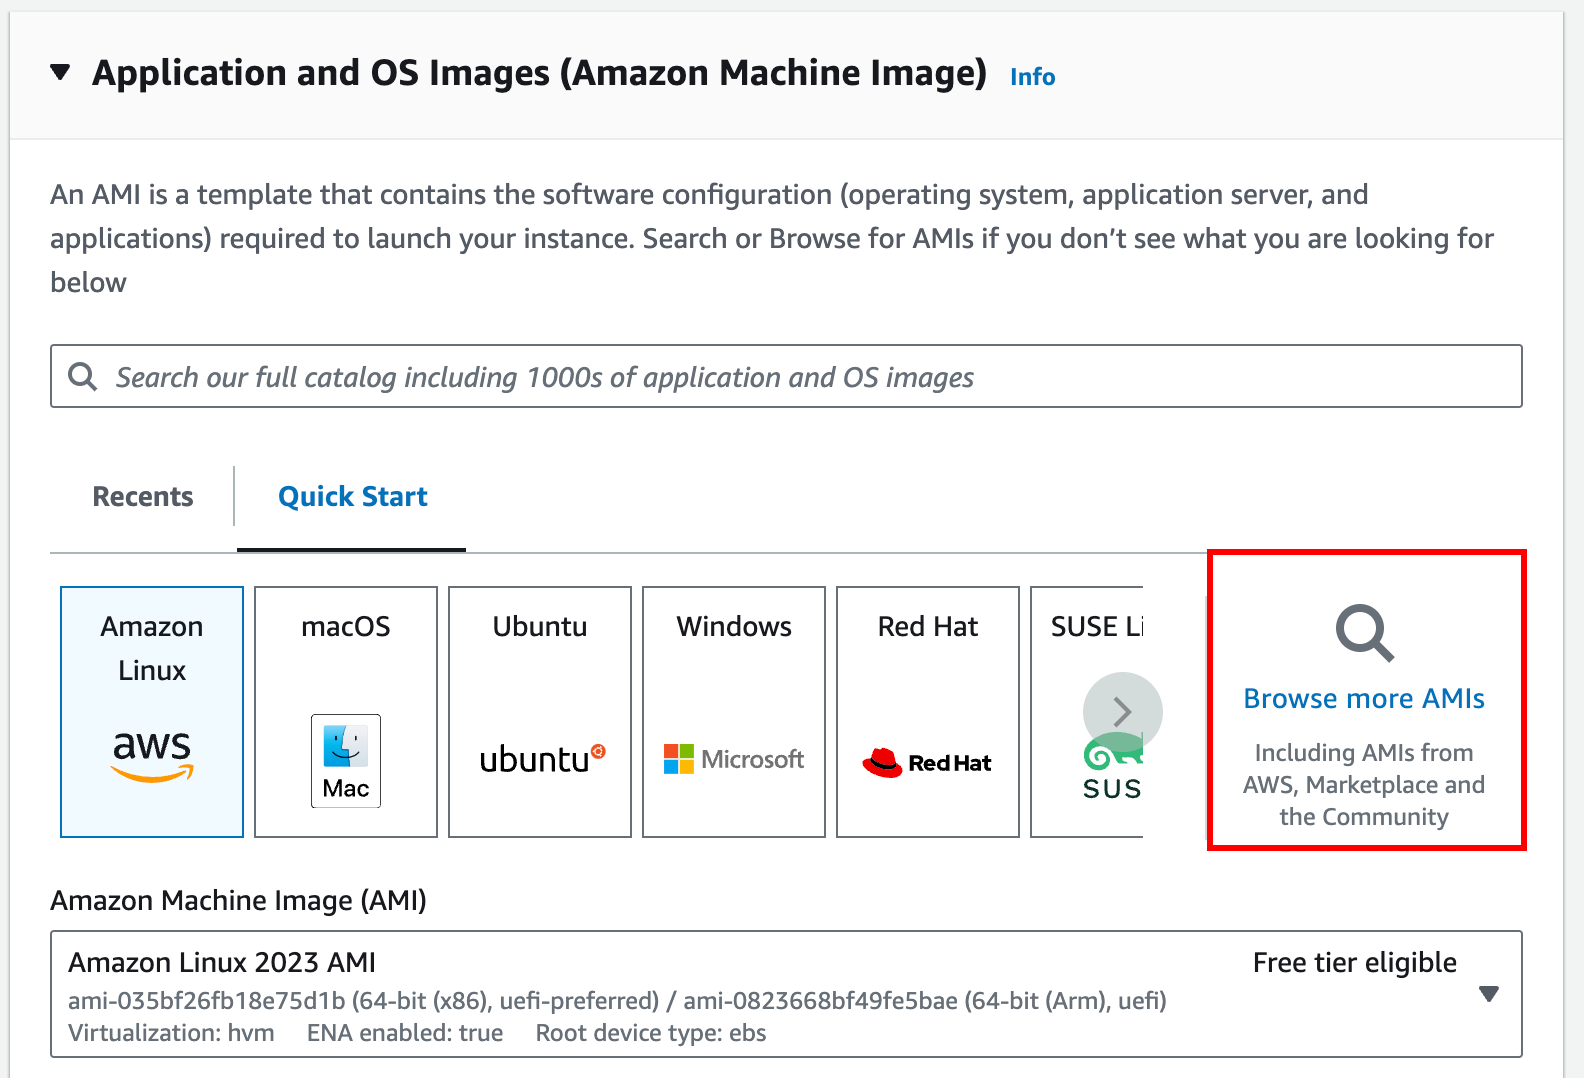
pip, NPM, Docker, AWS CLI, AWS CDK) will work on your local machine.Navigate back to the EC2 dashboard and select Launch Instance. You can name the instance anything.

Screenshot indicating the Launch Instances button Click on the “Browse more AMIs” button.
Click on the “Community AMIs” tab, then search for
ami-02ffb1f43e49576e5. This will give you a VM image with all the tools needed to complete this assignment.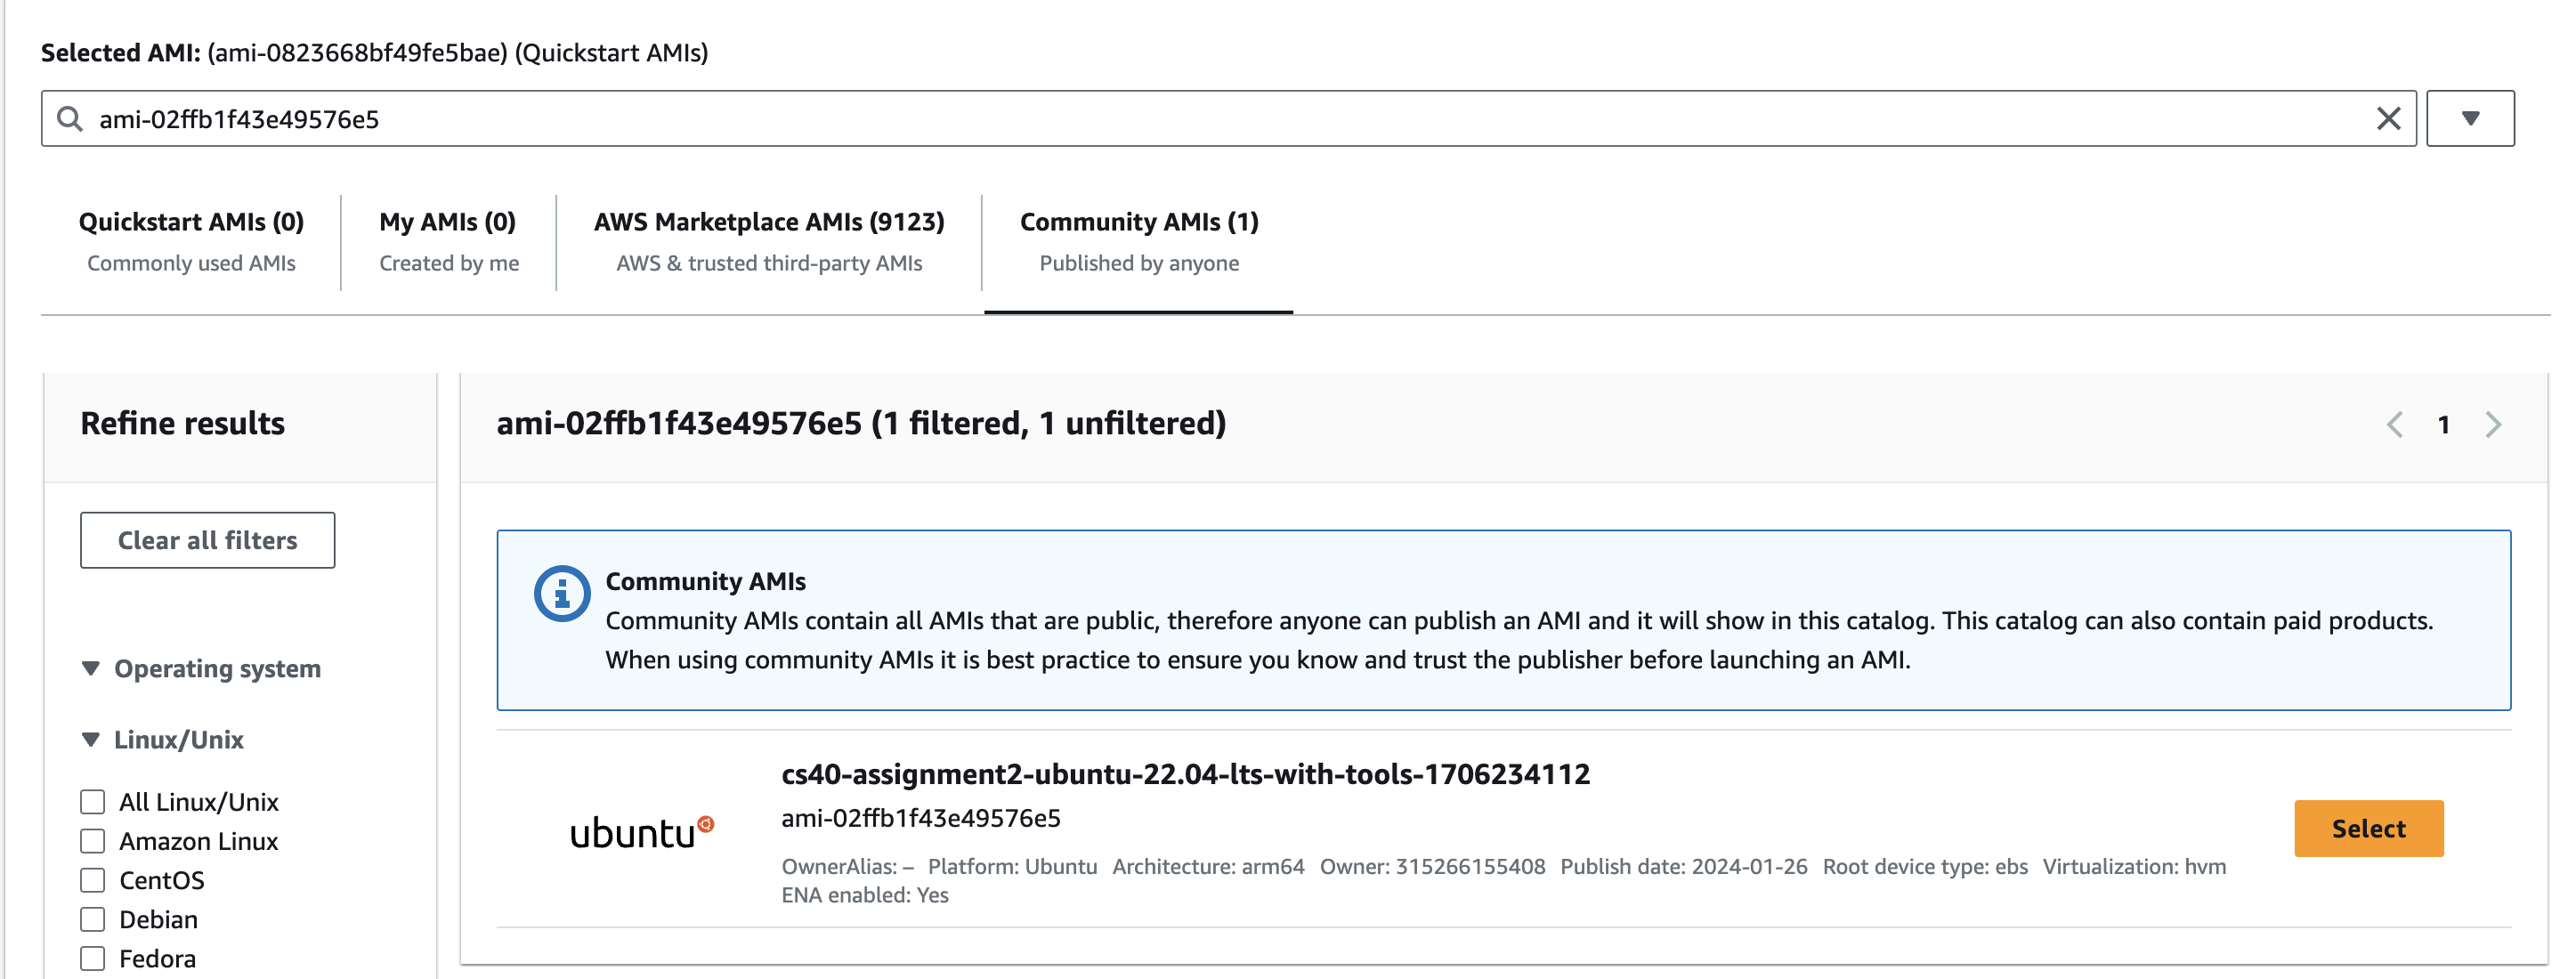
Use the following settings:
t4g.mediuminstance type- Use the keypair you created in Assignment 1
- Create a new security group (firewall). Allow SSH traffic inbound (port 22).
- 20 GB of storage
Make sure you are using
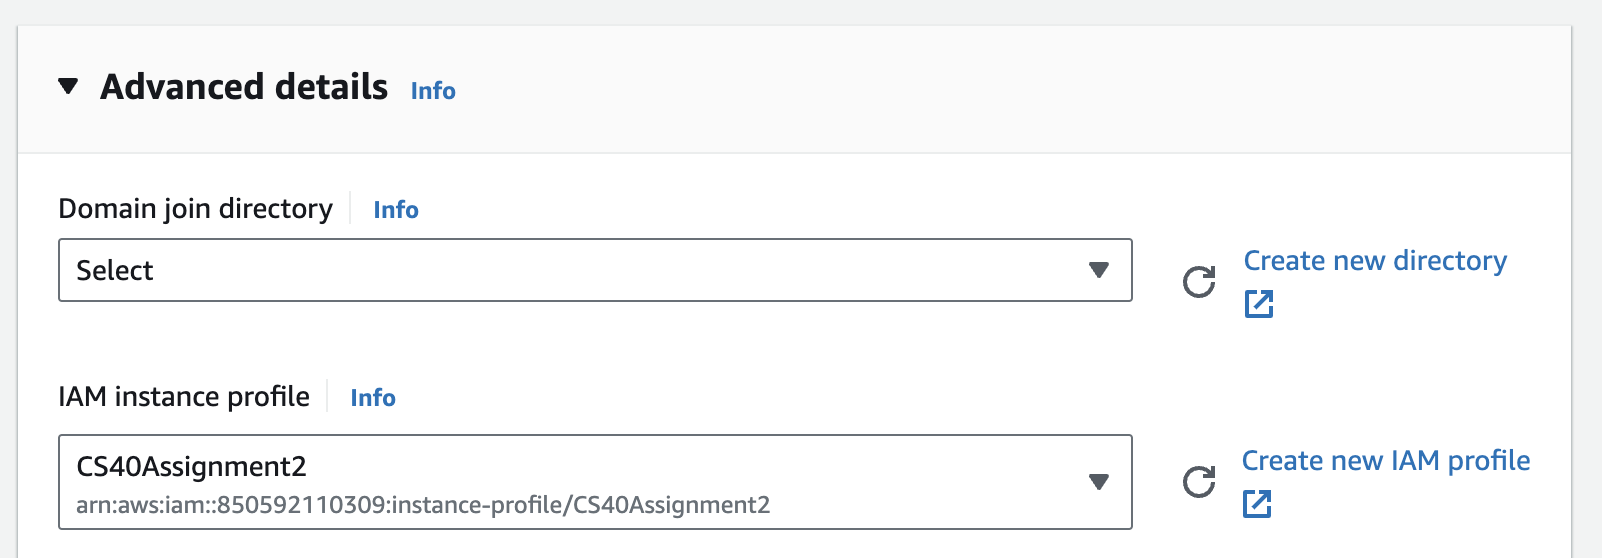
t4g.mediumas a larger instance type will increase costs.Expand the “Advanced Details” dropdown and click “Create new IAM profile”. This should open a new tab displaying the Identity and Access Management (IAM) console.

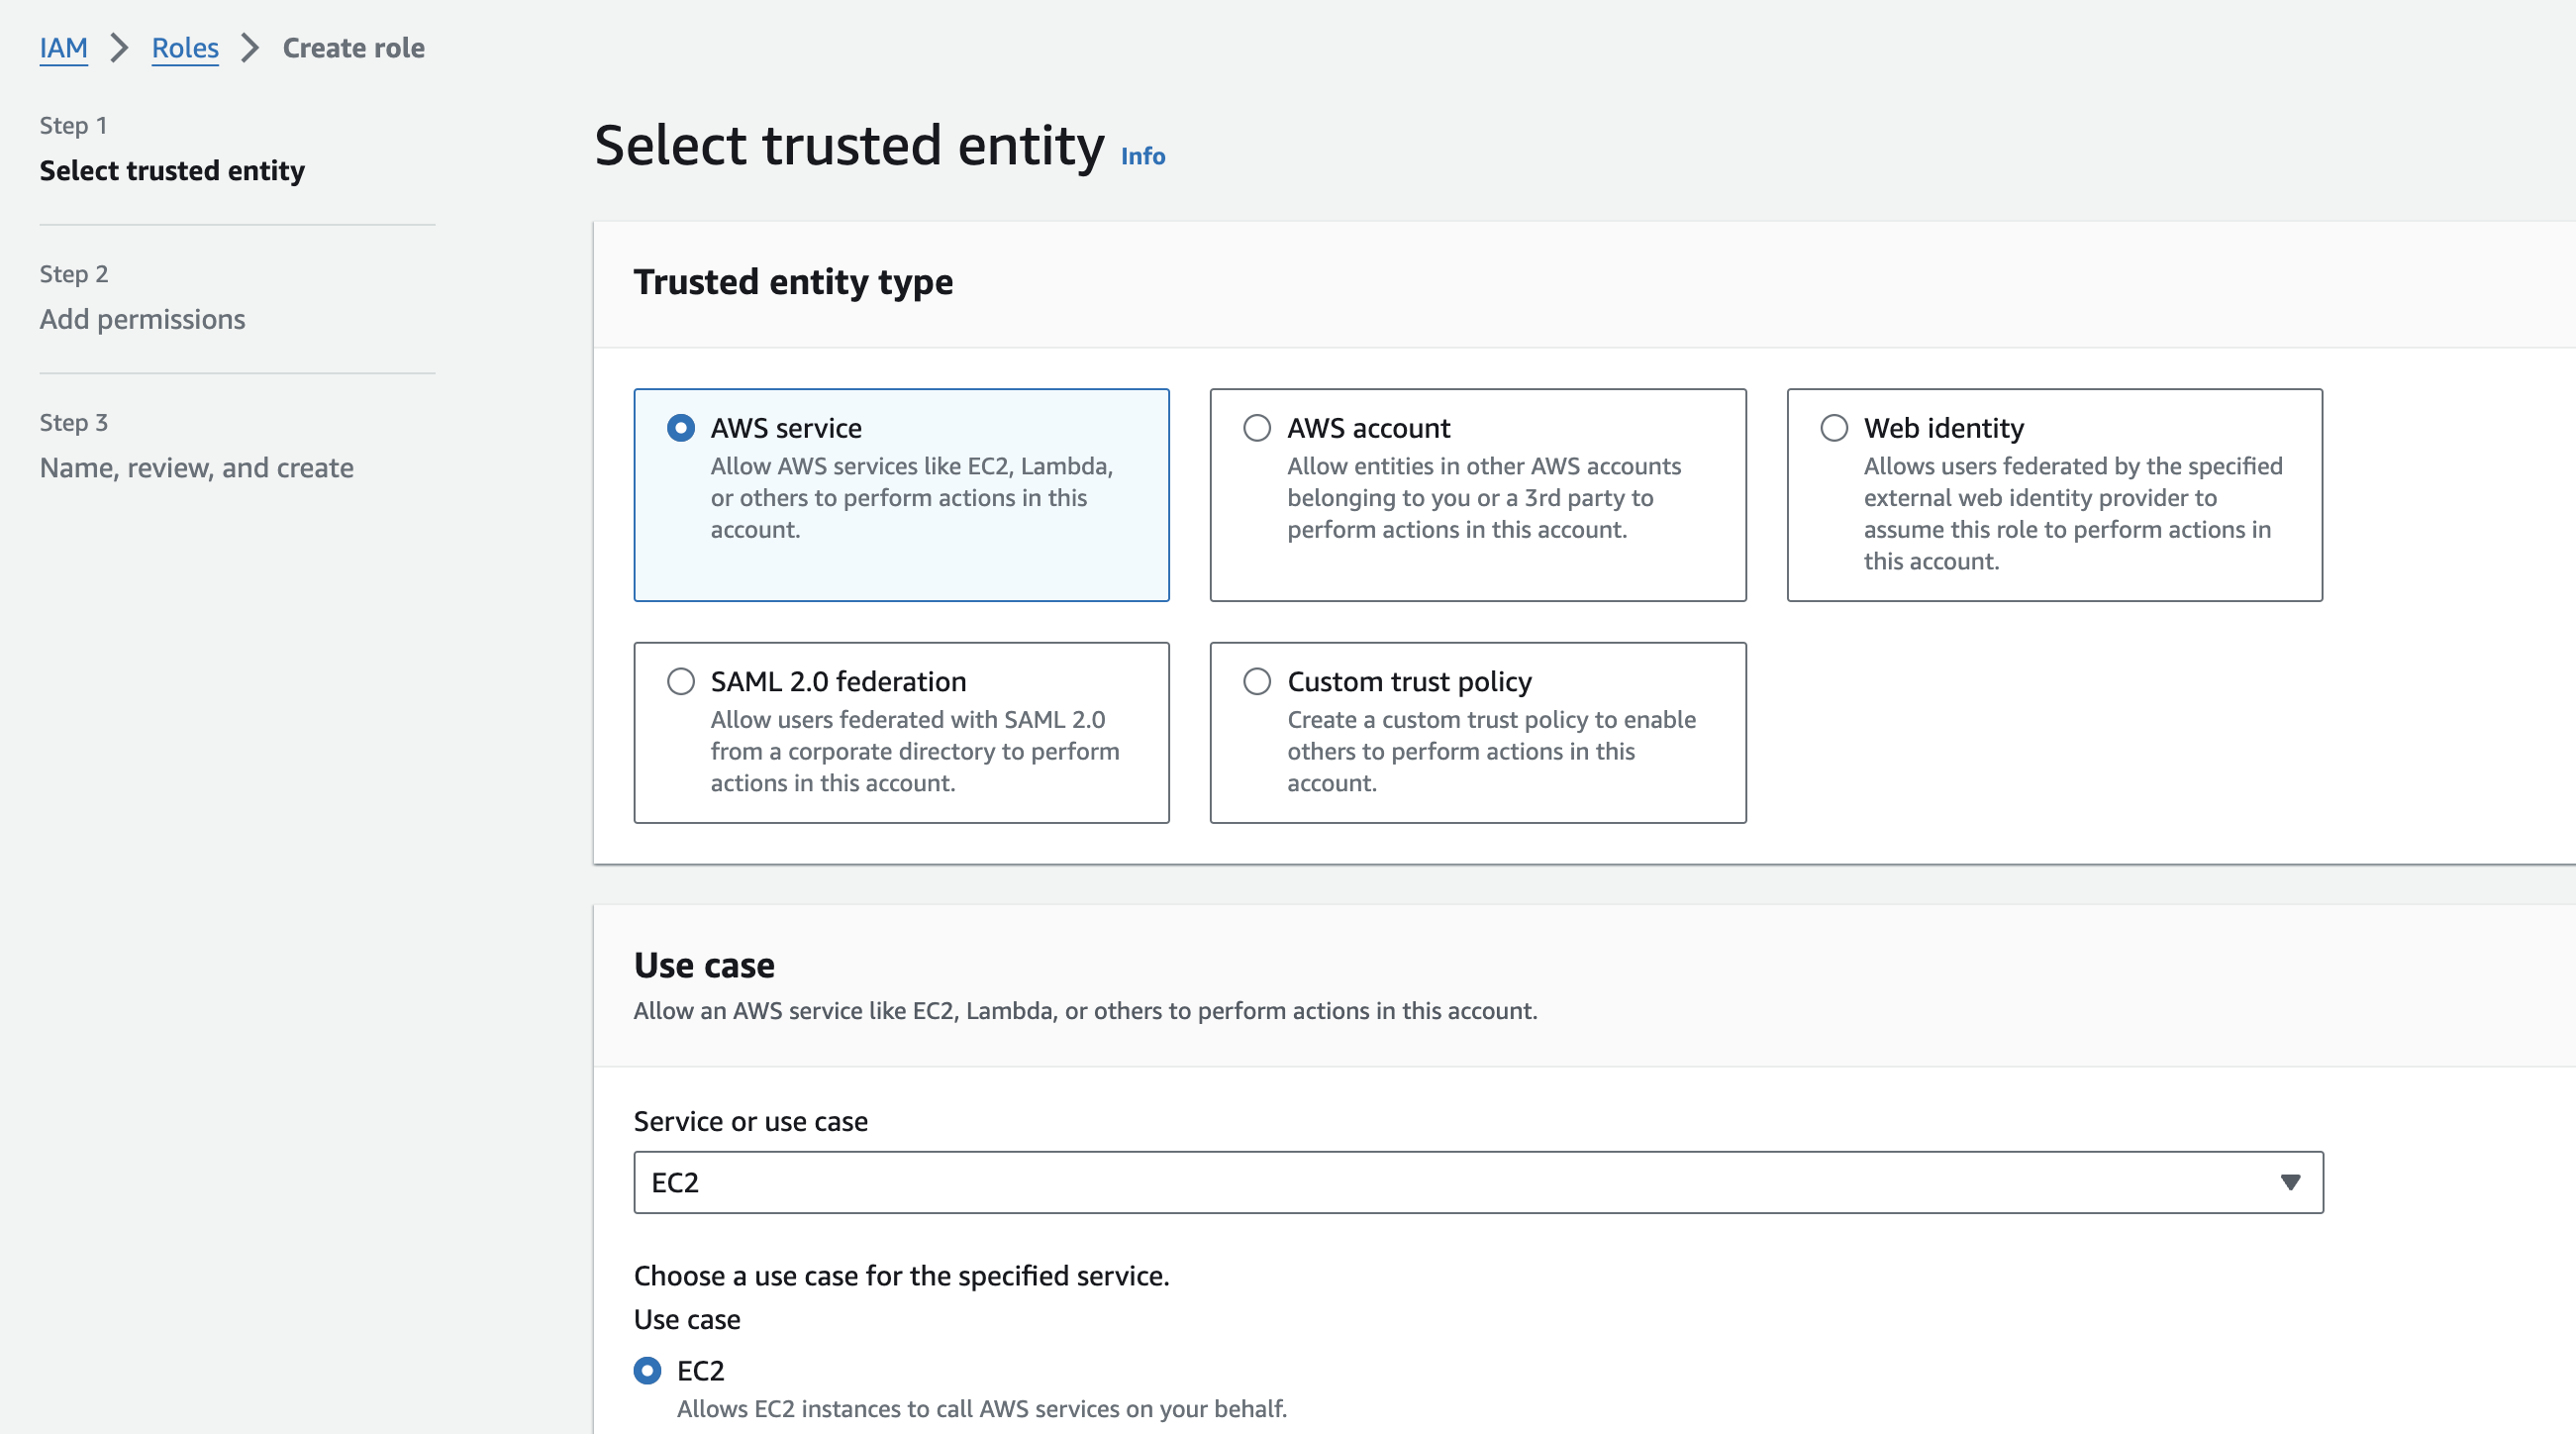
On the top right, click the orange “Create Role” button. Keep the “Trusted entity type” selection as “AWS service” (which should be default), and then select “EC2” from the dropdown. Keep the default “EC2” radio button checked. Click “Next”.
Search for the
AdministratorAccesspermission policy and select it. This policy creates permissions to manage non-user resources in your AWS account.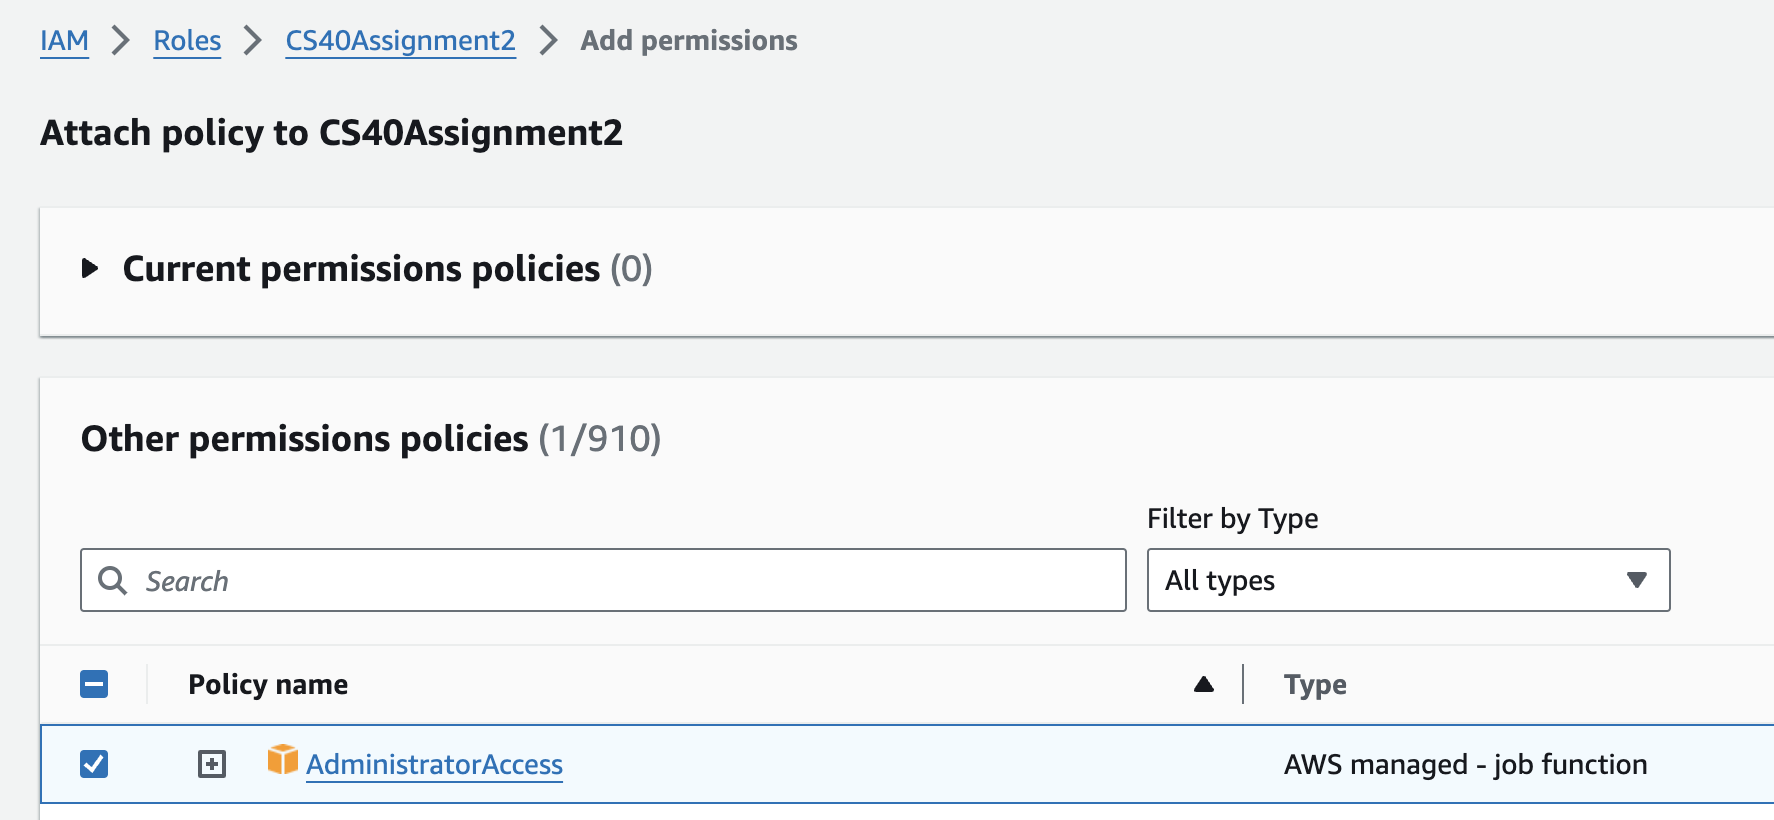
Click “Next”. You can name your role anything; we suggest something like
CS40Assignment2.Go back to the EC2 instance creation wizard tab. Click the refresh button next to “IAM instance profile” and select your newly created role.
Launch your instance. Confirm that the launch was successful and the instance is running.
Make a note of the instance’s IP address, which you’ll use to SSH into the VM as user
root(e.g.,ssh [email protected]). If you encounter issues with an error looking something like “Permission denied (publickey)”, then if you’re sshing in from VSCode try sshing in from a regular terminal (the one that comes installed with your OS) instead.Once SSHed, run the command
aws sts get-caller-identityto ensure that your EC2 instance has the proper permissions to complete the assignment. The output should look something like the following.
If you’re working with another student, add your partner’s SSH public key so that they can log in. This will look something like
echo "ssh-ed25519 AAAAC3NzaC1lREDACTEDAAAAIPmXTFC3B4caraPBBenjtyi7Hqs8REDACTEDVQAEyOU [email protected]" >> ~/.ssh/authorized_keys⚠️Ensure you use>>and not>, as the latter will overwrite your own public key, potentially locking you out of your VM.To work with code that resides on your EC2 development VM, you can follow this guide to connect Visual Studio Code to your VM over SSH.
Starter code
First, log into GitHub and click “Import repository”.

Use https://github.com/infracourse/assignment2 for “Your old repository’s clone URL”. You can name the new repository anything under your personal account; we suggest something like cs40-assignment2.
Make sure to keep the repository private. If you’re working with a partner, make sure to add them as a collaborator in Settings.
On your EC2 instance, clone the Assignment 2 starter code into your working directory: git clone --recursive [email protected]:yourusername/cs40-assignment2 assignment2.
You might need to add your SSH key to GitHub to make sure this clone step (as well as subsequent pushes to GitHub) will work; follow this guide on how to do so.
Note that you don’t necessarily need to generate a new keypair within your EC2 instance; just using agent forwarding (e.g., ssh -A [email protected]) should work as long as you add the keypair from Assignment 1 to GitHub.
Add our upstream repository as a secondary origin in your locally cloned Git repository:
git remote add upstream [email protected]:infracourse/assignment2If we need to update the starter code after assignment release, you can pull the updated code by running:
git pull --rebase upstream mainAs you work, you can push commits to your individual repository by runnign:
git push origin mainapp (backend) or web (frontend) submodule directories, but it doesn’t hurt yourself to familiarize yourself with this code. In particular, you might want to take a look at how we create presigned Cloudfront download links for image rendering and presigned S3 upload links. This is in the file app/app/ext/s3.py.Validating code while you work
You should test your code as you work. AWS CDK allows you to synthesize resources without deploying them. To do so, simply run cdk synth. This should give you ideas of what to fix if you see errors.
To ensure you’re defining your resources correctly as you work through the assignment, we’ve included some Open Policy Agent rules that validate your code (these rules also form the basis of this assignment’s autograder).
To validate your code, simply run ./grade.sh from your assignment2 directory. We strongly recommend testing your code locally this way before deploying to AWS.
./grade.sh, you will need to be able to run cdk synth. To do this, follow the instructions in “Deploying to AWS” until “Deploy remaining resources” to configure a virtual environment and the required AWS account resources.The AWS Cloud Development Kit
AWS’s Cloud Development Kit (CDK) is an infrastructure-as-code technology that lets the developer define cloud resources using familiar programming languages (in our case, Python). CDK is a layer of abstraction over AWS CloudFormation, which is a way to declare cloud resources using configuration formats such as JSON or YAML.
CDK’s basic unit of deployment is called a stack. Each stack encloses a number of AWS resources that are all deployed together. In the starter code, we’ve defined four stacks for you based on the above categorization: DnsStack, NetworkStack, DataStack, and ComputeStack. Take a look at the starter code to see some examples of resource declarations.
In particular, observe that resources in ComputeStack depend on those in the other three stacks, and that resources in DataStack also depend on resources in NetworkStack and DnsStack.
To help share resource information across stacks, we’ve defined for you in cdk/cdk/util.py a Props object that contains references to each CDK resource that will need to be referenced from another stack. Take a read through the starter code to see how to use this.
More about CDK (review from 1/31’s IaC lecture)
Generally, cloud infrastructure-as-code frameworks are declarative, rather than imperative, programming models. In other words, you express the desired end state of the infrastructure (e.g., “create an EC2 VM instance of type t4g.small”) but without specifying the steps to reach that state. CloudFormation is an example of a declarative IaC framework, as is Terraform.
For example, to define the aforementioned EC2 instance, you would use the following CDK code:
from aws_cdk import (
    Stack,
    aws_ec2 as ec2
)

# Boilerplate: each resource instantiation needs to go in a Stack's constructor.
class ExampleStack(Stack):
    def __init__(
        self, scope: Construct, construct_id: str, **kwargs
    ) -> None:
        super().__init__(scope, construct_id, **kwargs)

        # The actual instance declaration.
        instance = ec2.Instance(
            self,
            "example-ec2-instance",
            instance_type=ec2.InstanceType("t4g.small"),
            machine_image=ec2.MachineImage.latest_amazon_linux(
                cpu_type=ec2.AmazonLinuxCpuType.ARM_64
            ),
            vpc=ec2.Vpc.from_lookup(self, "VPC", is_default=True)
        )
Note that simply calling the ec2.Instance constructor will create the instance – we don’t necessarily need to save the instantiation to a variable. However, one powerful aspect of CDK is the ability to cross-reference a previously declared resource during the instantiation of a new resource.
For example, suppose we wanted to associate a DNS record (domain name) with the newly created EC2 instance using Route 53. This requires knowing the public IP address of the EC2 instance! We do this as follows:
from aws_cdk import (
    Stack,
    aws_ec2 as ec2,
    aws_route53 as r53
)

class ExampleStack(Stack):
    def __init__(
        self, scope: Construct, construct_id: str, **kwargs
    ) -> None:
        super().__init__(scope, construct_id, **kwargs)

        # Import the existing Hosted Zone created earlier.
        hosted_zone = r53.HostedZone.from_lookup(
            self, "EXAMPLE_ZONE_ID", domain_name="example.infracourse.cloud"
        )

        instance = ec2.Instance(
            self,
            "example-ec2-instance",
            instance_type=ec2.InstanceType("t4g.small"),
            machine_image=ec2.MachineImage.latest_amazon_linux(
                cpu_type=ec2.AmazonLinuxCpuType.ARM_64
            ),
            vpc=ec2.Vpc.from_lookup(self, "VPC", is_default=True)
        )

        # Create a DNS record `a2-example.example.infracourse.cloud`
        # pointing at the EC2 instance's public IP address.
        dns_record = r53.ARecord(
            self,
            zone=hosted_zone,
            record_name="a2-example",
            target=r53.RecordTarget.from_ip_addresses(
                instance.instance_public_ip
            )
)Defining resources in CDK
As you’ve observed, our starter code defines some CDK resources for you, but we’ve left you a number of comments where you need to define the remainder of the resources to complete the Yoctogram deployment.
Before you proceed, take a look at the Settings class in cdk/cdk/util.py and take stock of the variables we’ve defined that you can use in your CDK code to centralize environment specifics.
Additionally, the CDK Python API reference will be very helpful for the rest of the assignment.
Setting environment specifics
Although much of the CDK code is generalizable across deployment instances, some of it still needs to be customized for your own particular deployment.
In the cdk directory, create a file called .env. Paste the following into it:
SUNET=SUNETID
CDK_DEFAULT_ACCOUNT=yourawsaccountid
substituting SUNETID with your SUNet ID and CDK_DEFAULT_ACCOUNT with your 12-digit AWS account ID.
Network Stack
This section will focus on filling out resources in cdk/cdk/network_stack.py.
Virtual Private Cloud (VPC)
We’ve given you a shell Virtual Private Cloud (type ec2.Vpc), where our compute and database resources will live. Add the following specifications:
- Two availability zones:
us-west-2aandus-west-2b - The VPC’s IP address space should be
10.0.0.0/16 - Three subnets, each within a CIDR
/24, of the following types:- Public
- Private with outbound (egress) internet access via a NAT gateway
- Private and isolated (no egress internet access)
TLS Certificate
We’ve given you a shell Transport Layer Security (TLS) certificate (type acm.Certificate), which allows us to enable HTTPS for the Yoctogram frontend and backend. Add the following specifications:
- Domain name:
SUNETID.infracourse.cloud - Subject alternative names:
*.SUNETID.infracourse.cloud*.yoctogram.SUNETID.infracourse.cloud
- Validation via DNS from the provisioned Hosted Zone (
props.network_hosted_zone)
Data Stack
This section will focus on filling out resources in cdk/cdk/data_stack.py.
Aurora Serverless Database
We’ve given you a shell Relational Database Service (RDS) Aurora Serverless Cluster (type rds.ServerlessCluster), which defines the primary Postgres-based database where user and image records will be stored. Add the following specifications:
- Postgres engine version 13.10
- Hosted in the VPC you created earlier, in the private, isolated (no egress) subnets
- Database name
yoctogram - Database credentials generated for you within Secrets Manager, with username
yoctogram- Exclude special characters from the credentials (conveniently, this string is defined for you as
settings.DB_SPECIAL_CHARS_EXCLUDE)
- Exclude special characters from the credentials (conveniently, this string is defined for you as
Compute Stack
This section will focus on filling out resources in cdk/cdk/compute_stack.py.
Fargate task definition
We’ve given you a shell ECS Fargate Task Definition (type ecs.FargateTaskDefinition), which provides the runtime configuration for the Yoctogram backend container. Add the following specifications:
- 512 CPU units
- 2 GB of RAM
- Linux operating system
- ARM64 architecture
To ensure that the container can access needed resources, grant the task role for the task definition access to the database and signing key secrets, as well as the private and public images S3 buckets.
Fargate container definition
To your Fargate task definition, add a container with the following specifications:
- Container image: derive from the Yoctogram backend source code in the
appdirectory - Expose port 80 (HTTP/TCP) on the container. Note: the application protocol here should be HTTP.
- The following environment variables should be injected into the container, for configuration:
- key
PRODUCTION, valuetrue - key
DEBUG, valuefalse - key
FORWARD_FACING_NAME, valueyoctogram.SUNETID.infracourse.cloud - key
PUBLIC_IMAGES_BUCKET, value as the bucket name for your previously created public images S3 bucket - key
PRIVATE_IMAGES_BUCKET, value as the bucket name for your previously created private images S3 bucket - key
PUBLIC_IMAGES_CLOUDFRONT_DISTRIBUTION, value as the URL for the Cloudfront distribution for public images (props.data_cloudfront_public_images) - key
PRIVATE_IMAGES_CLOUDFRONT_DISTRIBUTION, value as the URL for the Cloudfront distribution for private images (props.data_cloudfront_private_images)
- key
- Your generated database secrets should be injected into the container. These are stored in Secrets Manager as a JSON key-value structure. To make this simpler, we’ve provided the keys as an array in
settings.DB_SECRET_MAPPING. The secret values are populated indata_stack.py, so you’ll want to iterate over the keys and values ofsettings.DB_SECRET_MAPPINGand retrieve the secrets from the secrets manager using the value of theDB_SECRET_MAPPINGas a key in the secrets manager.
DB_SECRET_MAPPING, which maps the names of secrets to placeholders, the one in the secrets manager, which maps the placeholders in DB_SECRET_MAPPING to the values generated in data_stack.py. For the final secrets parameter, we want a mapping of the keys of DB_SECRETS_MAPPING to the generated values.The JWT signing key we’ve provided a definition for should also be injected into the container under the key
SECRET_KEY, so the finalsecretsvalue should be a union of the database secrets and the JWT signing key.The container should be health-checked using the following command:
curl -f http://localhost/api/v1/health/ || exit 1Configure logging in the container using the following code:
    logging=ecs.AwsLogDriver(
       stream_prefix=f"{settings.PROJECT_NAME}-fargate",
       log_retention=logs.RetentionDays.ONE_WEEK,
    ),
depending on when you started the assignment, this may have already been done for you, however if it has not, you should add it yourself.
Fargate service
Tie the backend resources together by creating an ecs_patterns.ApplicationLoadBalancedFargateService, which creates a Fargate service from your existing cluster and task definition with a load balancer in front of it.
Attach the domain name api.yoctogram.SUNETID.infracourse.cloud and the backend certificate you created in the network stack to the load balancer. Also, make sure to redirect all HTTP port 80 traffic to HTTPS port 443. Ensure that the definition for your ApplicationLoadBalancedFargateService takes in the cluster that we defined for you.
At this point, you should be done configuring the backend!
Cloudfront frontend deployment
We’ve included some code that uploads the frontend code in web to an S3 bucket for deployment. Here, you’ll connect the bucket to Cloudfront to cache frontend resources close to users for faster access and better security. You’ll need to configure two behaviors for the Cloudfront distribution – configurations that tell Cloudfront how to route different requests.
The first (default) behavior should use the S3 frontend bucket we’ve configured for you as the origin. Ensure that all requests made using unencrypted HTTP are upgraded to HTTPS. Ensure that when users load the Cloudfront distribution, they are directed to index.html by default.
The second behavior should intercept all requests made to the /api/* path and direct them to the backend service. For this, the origin should be configured as the HTTP origin api.yoctogram.SUNETID.infracourse.cloud, again redirecting all HTTP requests to HTTPS. Make sure to forward all HTTP headers (except the Host header) and allow all HTTP methods.
Lastly, attach the domain name yoctogram.SUNETID.infracourse.cloud and the frontend certificate to the Cloudfront distribution. Also, make sure to redirect all 404 (not found) errors to index.html with a 200 OK response code.
Deploying to AWS
Preparing frontend code
In the web directory of the Assignment 2 repository, make a file named .env and paste the following in:
VITE_PROD_API=https://yoctogram.SUNETID.infracourse.cloudThen, run the following commands to set up the frontend code for deployment:
npm install
npm run build
Synthesizing CDK resources
First, make and activate a Python virtual environment in the cdk directory of your Assignment 2 repository. Then, install the dependencies for the CDK project using pip:
python3 -m venv venv
source venv/bin/activate
pip install -r requirements.txt
This should now allow you to get started with the CDK deployment process.
First, synthesize your CDK definitions to a CloudFormation template. To do so, run the following command:
cdk synthIf your definitions are correct, this should not yield any errors. If this step completes successfully, you can then go ahead and deploy to AWS.
Deploying DNS
The next step is to make your account ready for the deployment process. Run the following command:
cdk bootstrapYou’ll first want to deploy the standalone DNS stack. To do so, run the following command:
cdk deploy yoctogram-dns-stackThen, log into the AWS console and navigate to Route 53. Click on “Hosted Zones”; there should now be one entry for SUNET.infracourse.cloud. Click on this entry.
You should see a table with two rows, where one row contains entries of type NS and the other of type SOA. Locate the NS record, and copy the four lines under the column “Value/Route traffic to”.

Go to https://provisiondns.infracourse.cloud/ns. Log in with your Stanford Google account, and then paste the four lines you copied into the text box. Click submit.
infracourse.cloud (which is owned by the course staff) to delegate the child zone SUNETID.infracourse.cloud to your provisioned AWS Route 53 hosted zone. This allows you to create any child records of SUNETID.infracourse.cloud, such as example.SUNETID.infracourse.cloud.- Take a few minutes to let the newly created records propagate. To verify if this was successful, you can visit https://toolbox.googleapps.com/apps/dig/ in your browser and enter
SUNETID.infracourse.cloudinto the Name box, substitutingSUNETIDfor your SUNet ID (i.e., Cody would writecodyho) and clickNS. If everything is correct, you should see the nameservers that were provisioned within the AWS console.
SUNETID.infracourse.cloud since the record hasn’t had time to propagate. In this case, give it some time. Five minutes should be enough, but if it’s still broken after an hour, there might be a mistake and you should re-check the records you pasted into the DNS Provisioner site. You must have DNS working for the next steps in this assignment.Deploying remaining resources
Now, you can simply run
cdk deploy --allto deploy all remaining stacks to AWS. This should take around 10 minutes, if the deploy is still going after 20 minutes you likely made a mistake.
If everything worked properly, your own version of Yoctogram will now be deployed at https://yoctogram.SUNETID.infracourse.cloud!
If you need to conduct a teardown of the infrastructure you just provisioned, you can simply run cdk destroy, passing in one or more stack names.
yoctogram-dns-stack stack, as this needs to be deployed separately and before other stacks.Debugging
If you encounter errors during deployment, look in the Event logs in the CloudFormation console. If these logs are not sufficiently detailed, then look at the Event logs for the specific task of the specific AWS service. If you do not have any logs, make sure you configured logging (without logs, debugging is nearly impossible).
Submission and Grading
To submit your code, first create a file SUNET in the root of the assignment directory (that’s the one with the subdirectories app, cdk, and web, as well as some other files) that contains only your SUNet ID. The file must be named SUNET. For example, Cody would create the following SUNET:
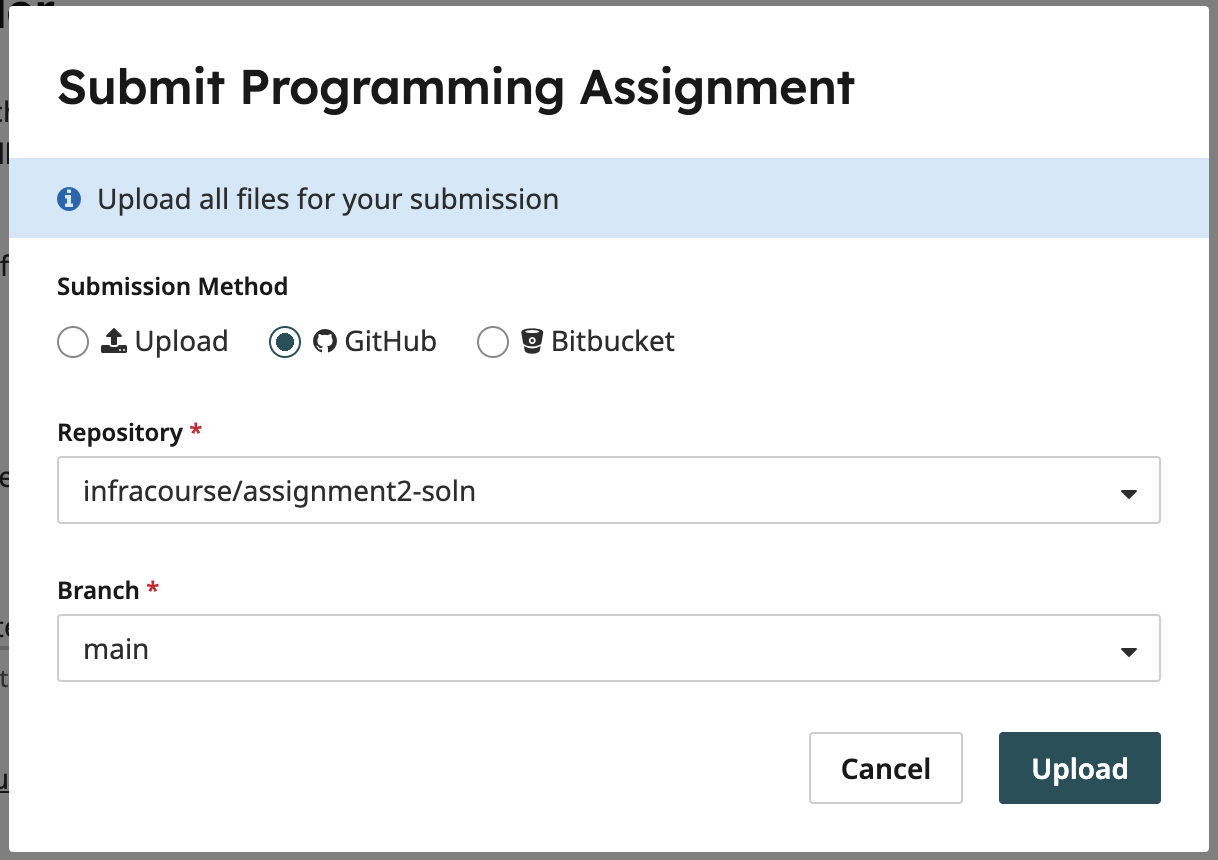
codyhoSUNET and the contents of the file should be your SUNet ID. If Cody were to call the file codyho this would be incorrect.Commit and push this file to GitHub, then upload your submission to Gradescope from GitHub.
The point distribution for this assignment is as follows:
- 90 points: Static Open Policy Agent evaluation against our OPA policies. This step verifies that the CloudFormation your CDK is synthesized to is compliant to our specification. All the tests are public in the
rulesdirectory and you are able to test this yourself using thegrade.shscript. - 40 points: Dynamic website interaction. We impersonate a real user, creating accounts and attempting to upload and view images. If you can open the site in a browser and are able to use it, you should get full points.
- 20 points: Verification that the website’s appearance is as expected. If you can load
yoctogram.SUNETID.infracourse.cloudin your browser, and everything looks correct (all the assets in the right place, CSS loads, etc) then you should get full points.
As always, you can submit as many times as you want until you’re satisfied with your grade.